Creating Botanical Ink from Foraged Garden Scraps

Ever wondered why your hand-drawn sketches look a bit flat compared to the rich, moody tones of vintage botanical illustrations? This guide explains how to extract pigments from your own garden scraps to create professional-grade botanical inks. You'll learn the chemistry of mordants, the specific materials needed for pigment extraction, and how to turn organic waste into a functional art medium.
What Are the Best Plants for Making Natural Ink?
The best plants for making natural ink are those with high concentrations of tannins or strong anthocyanins, such as black walnuts, red cabbage, or oak galls. You aren't just looking for color; you're looking for chemical stability. If a plant has high tannin levels, it will create a darker, more permanent ink without much extra help.
Black walnut hulls are the gold standard here. They produce a deep, rich brown that stays stable over time. If you want to experiment with different hues, look toward your garden or even your kitchen scraps. Red onion skins yield a vibrant orange-gold, while blueberries can provide a striking purple—though be warned, berry pigments can be finchey and fade faster if not treated correctly.
Here are a few reliable sources for pigment:
- Black Walnut Hulls: High tannin content, extremely permanent, deep brown.
- Red Onion Skins: Great for warm yellows and oranges.
- Acorns/Oak Galls: Excellent for creating iron-based black inks.
- Hibiscus Flowers: Produces bright pinks and reds (though these are light-sensitive).
- Avocado Pits: Surprisingly produces a soft, dusty rose color.
I once spent an entire afternoon trying to get a consistent-looking pink from hibiscus, only to realize my pH levels were way off. It's a learning process.
How Do You Extract Color from Plants?
You extract color by simmering plant material in water to break down the cell walls and release the pigment into the liquid. This process is essentially a controlled decoction or infusion. The method changes slightly depending on whether you're working with soft leaves or hard barks/hulls.
For soft materials like flower petals or cabbage, a quick simmer is usually enough. For harder materials like walnut hulls or dried bark, you'll need a longer, more vigorous boil. This is where most people trip up—they don't boil it long enough to get the full pigment load. If your liquid looks weak, keep going. It's better to have a highly concentrated "tea" than a watery mess that won't behave when you dip your pen.
The Basic Extraction Process:
- Chop: Break your organic material into small pieces to increase surface area.
- Simmer: Place the material in a stainless steel pot (avoid aluminum—it reacts with the pigments) and cover with water.
- Boil: Bring to a boil, then reduce heat and simmer for 30 to 60 minutes.
- Strain: Use a fine mesh strainer or cheesecloth to remove all solid bits.
- Reduce: This is the secret step. Simmer the liquid alone until it reaches a thick, concentrated consistency.
If you're interested in the science of how colors change with pH, you might find the research on anthocyanins helpful. It explains why a single plant can look red in one environment and blue in another.
The Role of Mordants and Modifiers
A mordant is a substance that "fixes" the color to a surface or stabilizes the pigment in the liquid. Without a mordant, many of your botanical inks will simply fade into nothingness the moment they hit the light. In the world of ink-making, we often use metal salts to change the color or increase the permanence of the pigment.
Think of a mordant as a bridge between the pigment and the paper. You can use Alum (potassium aluminum sulfate) to brighten colors, or even Iron (ferrous sulfate) to darken them. In fact, adding iron to a pale yellow onion-skin ink can instantly turn it into a sophisticated, dark olive green. This is the fun part—the chemistry is almost like magic.
| Additive | Common Effect | Best For... |
|---|---|---|
| Iron (Ferrous Sulfate) | Darkens/Saddens colors (turns yellows to greens, reds to purples) | Creating deep blacks and dark browns |
| Alum | Brightens and clarifies colors | Keeping colors vibrant and light |
| Tannins (Oak/Walnut) | Increases permanence and depth | Creating foundational, long-lasting ink |
| Vinegar (Acid) | Shifts color toward the red/orange spectrum | Adjusting the pH of berry-based inks |
Don't go overboard with the metal salts, though. Too much iron can actually become corrosive and eat through your paper over time (a nightmare for any artist). Always test a small batch first.
Is Botanical Ink Safe to Use for Professional Art?
Botanical ink is safe for most artistic applications, but its suitability depends entirely on the pigment's lightfastness and the acid levels in your final product. If you intend to sell your work or create pieces that will be displayed in galleries, you must understand that natural inks behave differently than synthetic, pigment-based inks like those from Winsor & Newton.
Natural pigments are often "fugitive," meaning they fade when exposed to UV light. If you use a light-sensitive ink like beet juice, your painting might look great today but look completely different in two years. To prevent this, you need to use a stabilizer or a strong mordant during the reduction phase. Using a high-tannin base—like the walnut method mentioned earlier—is your best bet for a professional-grade result. It's a different kind of permanence, one that is more organic and evolving.
If you've ever experimented with natural indigo dyeing, you'll know that managing the chemistry of your vat or pot is half the battle. The same logic applies here. You aren't just making "colored water"; you're making a suspension of pigment and a chemically stable liquid.
Pro-Tips for Longevity:
- Use High-Quality Paper: Choose acid-free, heavy-weight-cotton paper to ensure the ink doesn't cause the paper to degrade.
- Test for pH: Use a pH strip to ensure your ink isn't too acidic, which can cause paper to become brittle.
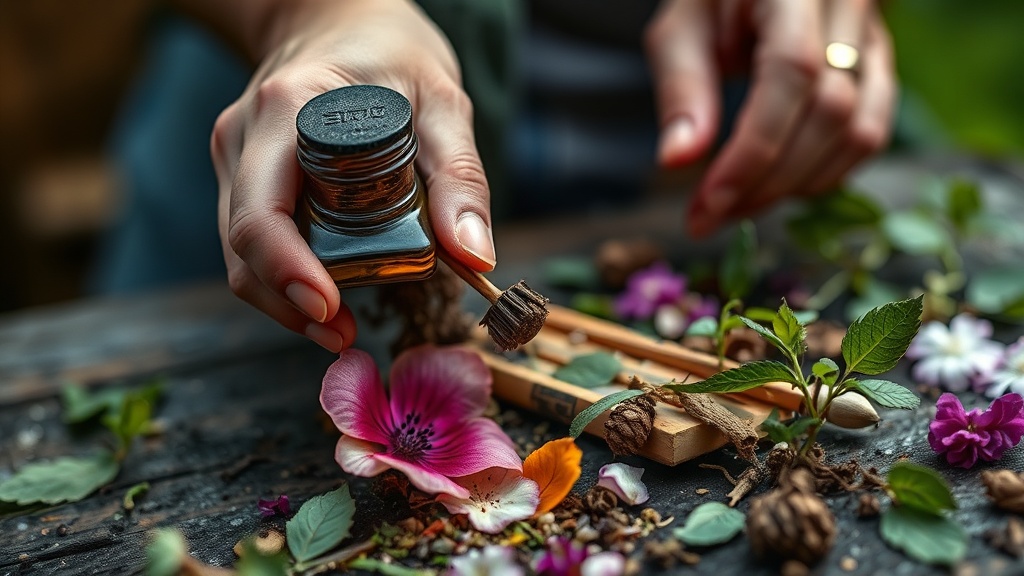
- Store in Dark Glass: Keep your finished inks in amber glass bottles away from sunlight to prevent premature oxidation.
I usually keep my walnut ink in a small amber dropper bottle. It keeps the light out and makes it easy to use with a dip pen. It's much more satisfying than using a standard fountain pen ink that lacks that organic texture.
The beauty of this process is the unprediction. You might start with a bright yellow and end up with a moody, sophisticated ochre. It's not about perfection; it's about the dialogue between the plant and the chemistry. If you find yourself obsessed with the way textures interact with these pigments, you might also enjoy my previous piece on exploring texture through found objects.
The most important thing is to keep a notebook. Record exactly what you used, how long you boiled it, and what you added at the end. Without those notes, you're just making colored water and hoping for the best.
Steps
- 1
Gathering Your Ingredients
- 2
Simmering and Reducing
- 3
Straining and Filtering
- 4
Adding a Mordant for Longevity